TinyXL: Compact 3D Printer Concept
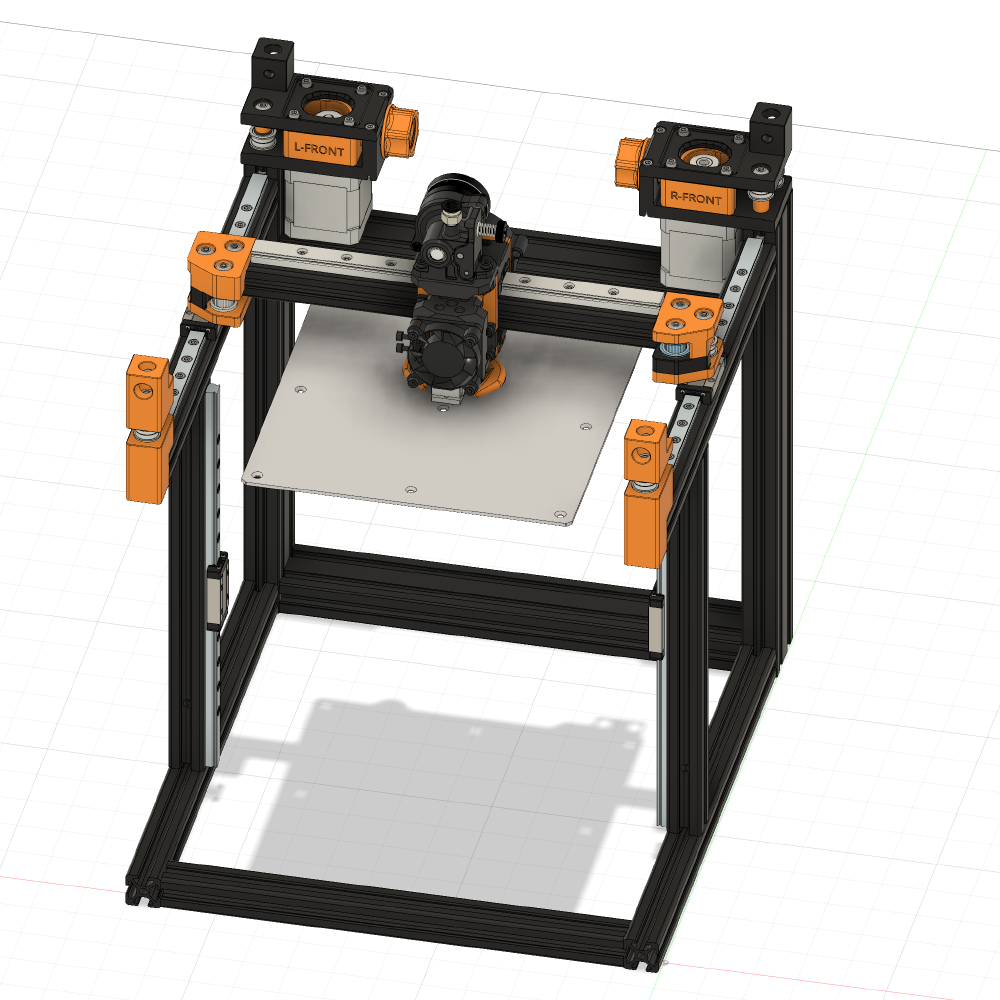
I was looking to build a smaller printer, and I liked Tiny-M’s overall size and design, but I also had some ideas for improvements. I wanted it to be more space-efficient, and I started tinkering in the CAD. When PrusaXL was revealed, I thought the open front was very practical and decided to use the same approach in my design. That’s how the concept of TinyXL was born: based on Tiny-M and inspired by PrusaXL.
Features
It has all the great features of the Tiny-M and more:
Space efficiency
Space efficiency was my main goal for this design. I wanted to achieve the biggest build volume with the smallest frame possible. Smaller printers are easier to work on, they can print fast while maintaining good quality, and they are also cheaper to build. I thought I could get 180mm^3 build volume out of the standard Tiny-M frame, but that eventually turned out to be a bit too optimistic.
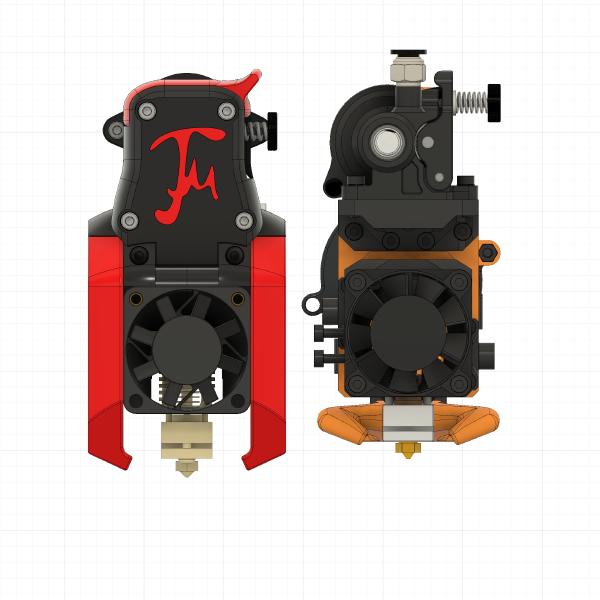
My first step was to change the toolhead. The stock toolhead takes up 60mm on X-axis. I used EVA toolhead on one of my other printers, and I liked the design a lot. It only had a 40mm footprint on the X-axis, but it took an extra 20mm in Y travel due to a 5015 part cooling fan at the back. However, I decided the trade was worth it since it also improved the cooling and supported a lot of hotend and extruder options. I gained 20mm of extra travel in X (150→170) and lost 20mm in Y (150→130).
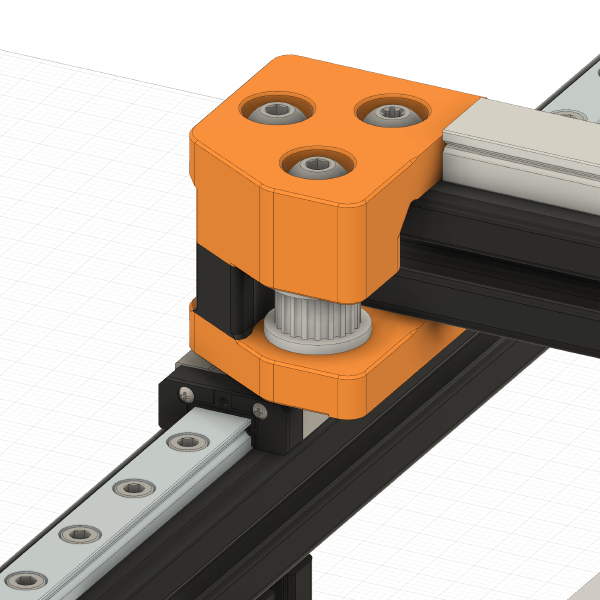
The next place I found to gain additional X travel was XY joints and Y rails. On Tiny-M, Y rails are placed on the side of side extrusions protruding into the build area. I think this design decision came from Voron 0, where MGN7 carriages were too wide to fit on top of 1515 aluminum extrusions and had to be placed that way. I moved MGN9 rails are on top of extrusions and saved another 10+mm. It got me to my goal of 180mm of travel.

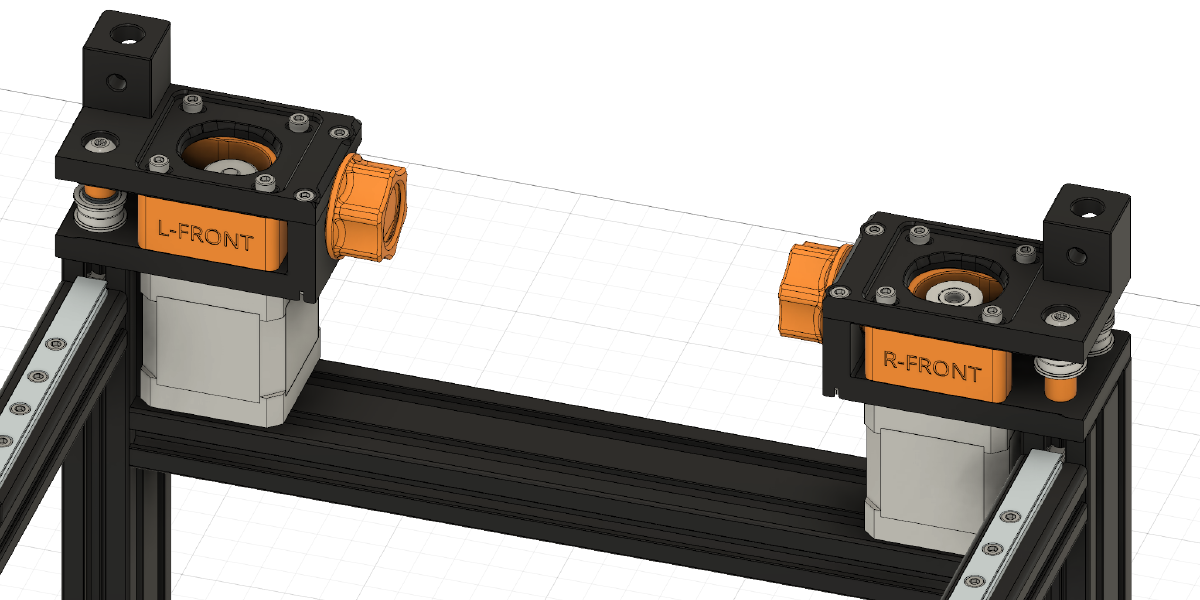
It was more challenging to gain more travel in the Y direction, especially after I had already lost around 20mm by switching to EVA toolhead with the 5015 fan on its back. I initially thought I would move the A/B motors outside of the frame and easily gain a lot of travel but later decided against it and looked for other options. I may consider it again in the future if I find an elegant way to pull it off (maybe TinyHevORT style). I regained the 20mm back by moving the top-back horizontal extrusion below the motors. I’m not 100% sure about this, but I think the frame should still be rigid enough. It makes it harder to secure the motor mounts to the frame, but I expect to figure it out. At this point, I was working with a 180x150 build area. I moved Y rails to the front and made the front idlers smaller to get 20mm more. Finally, I replaced vertical extrusions in the back with the 2040s, which gave me another 10mm. It increased frame footprint and cost, but I liked the mounting options it creates with a convenient 40mm deep space in the back for the electronics. In total, I only increased the frame depth by 10mm, but I got 30mm extra travel in both X and Y directions.
I still have some ideas to gain more space efficiency and shrink the frame back down in the future:
- I could modify the toolhead and make it more compact in the Y direction, but I would likely have to lose compatibility with the EVA ecosystem. I already had to modify EVA, and I will consider optimizing it for one specific hotend like E3D Revo Micro if I can get a significant improvement there.
- I could move Y rails even further to the front if I accept that at Y=0, the front fan would stick out outside the frame (which I’m probably okay with since I will likely run this machine open).
- I could use a 10x10 carbon tube to replace the 2020 X-beam, reducing weight and gaining Y travel.
Dual independent Z-axis
I wanted to beef up the Tiny-M Z assembly for the larger bed. At first, I pulled in the Z-axis from the Voron Trident, but that seemed overkill for such a small printer. Plus, after I moved the back top extrusion below the motors, it became unpractical. I already owned a printer with a dual independent Z-axis, and I liked the bed tramming on it. When PrusaXL came out, the open frame design convinced me to go the same route. On TinyXL, I will use bed tramming from Voron 1.8: dual independent Z motors and an adjustment screw at the front center.
Next steps
TinyXL is merely a concept at this point, and I will continue to tinker in CAD before I begin sourcing the components and building it. There is still a ton to figure out:
-
Finishing the CAD: mounting XY joints to carriages, fixing A/B motor mounts to the frame, adding Z motor mounts, bed assembly, and modifying EVA belt clamps to fit the belt path.
-
Test frame/motion system rigidity. I may need to bring back Tiny-M top braces, but I think their purpose was to help enclose the printer. I may need to rethink the back design if I can’t mount the A/B steppers properly (or I may need aluminum parts there). I’m not a mechanical engineer, and I don’t know how to make simulations for these things, so I will probably take the empirical approach here and build the frame prototype to test.
-
Decide on the electronics. Pick stepper motors, drivers, and a mainboard. I want to use a single power supply (24V) for simplicity. I don’t know yet if I can fit all the electronics in the back compartment. If I cannot, I would use external power brick (it would also make the printer lighter, which is nice when working on it). I would prefer that over having another compartment at the bottom and adding tall legs to the printer.
-
Research other extruder+hotend options to shrink the toolhead. Dragon hotend and Orbiter extruder is a great setup, but for a build like this where compactness is key, I may switch to Sailfin/Sherpa mini. I’m also interested in finding a hotend with a smaller footprint. I presume Revo Micro could be a great candidate, but it’s not available yet.
I’m sharing this here to get feedback. If you have any suggestions or would like to contribute to the design, please reach out. If you would like to follow the project as I’m building it, you can subscribe for the updates below. I will release the CAD file when the design becomes more stable, at this point I’m making changes all the time. I want to credit the Tiny-M project for base CAD design, the EVA project for the toolhead, and the PrusaXL for inspiring the open front design.