Installing Klipper on Sapphire Plus (SP-5)
TwoTrees Sapphire Plus (SP-5) comes with Marlin based firmware which I found quite inconvenient to use. My main complaint was that I had to recompile and reflash the firmware every time I changed my printer configuration. I decided to throw it away and switch to Klipper instead.
There’s one downside to running Klipper on Sapphire Plus: it does not support the display that comes with it. KlipperScreen project provides an interface on LCD screens but only works with more advanced LCDs. You will have to control your printer via web browser on a computer/phone or replace the screen with a compatible one.
It may seem like the display issue is a big deal, but it wasn’t to me because there are multiple great web-based user interfaces like Mainsail, fluidd or the older but the most complete OctoPrint. I suggest you go check them out and decide for yourself. Mainsail is the newest, and while it lacks some features of the others, it’s very snappy and catching up quickly.
You will need a Klipper host device like Raspberry Pi or similar. It’s easiest to run it outside the printer and connect via USB cable. You can later mount it inside but do not try to power Raspberry Pi from the motherboard. It doesn’t have enough power on 5V rail. I would recommend to get a 5V step-down converter powered from a 24V power supply inside.
Installing Klipper (like any other new firmware) is a relatively advanced procedure. If you don’t feel confident following the steps below, you should hold off.
-
Prepare your host device like Raspberry Pi by installing Mainsail OS on it. It’s the easiest way, but you could also use kiauh or install it completely manually (make adjustments to the following steps if you do).
-
Connect to the Raspberry Pi via SSH. Change directory to “~/klipper” and run “make menuconfig”. Configure the settings like this (select STM32F407 if you have newer Robin Nano 1.3):
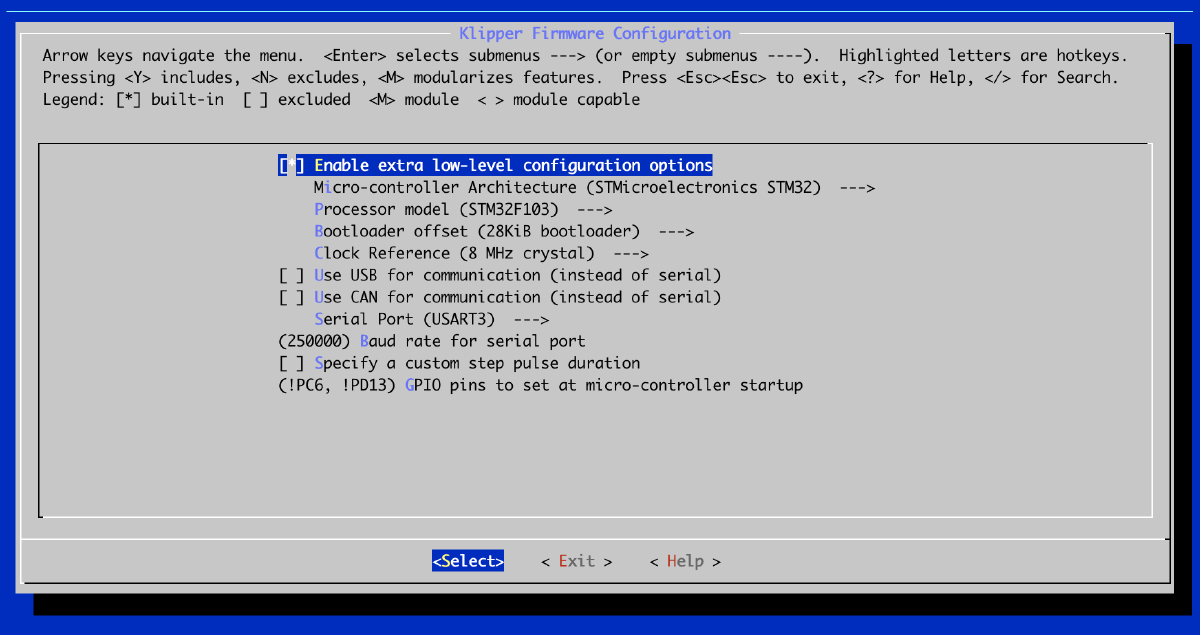
“!PC6,!PD13” is needed to clear the display, otherwise it would be stuck in “Booting…” screen.
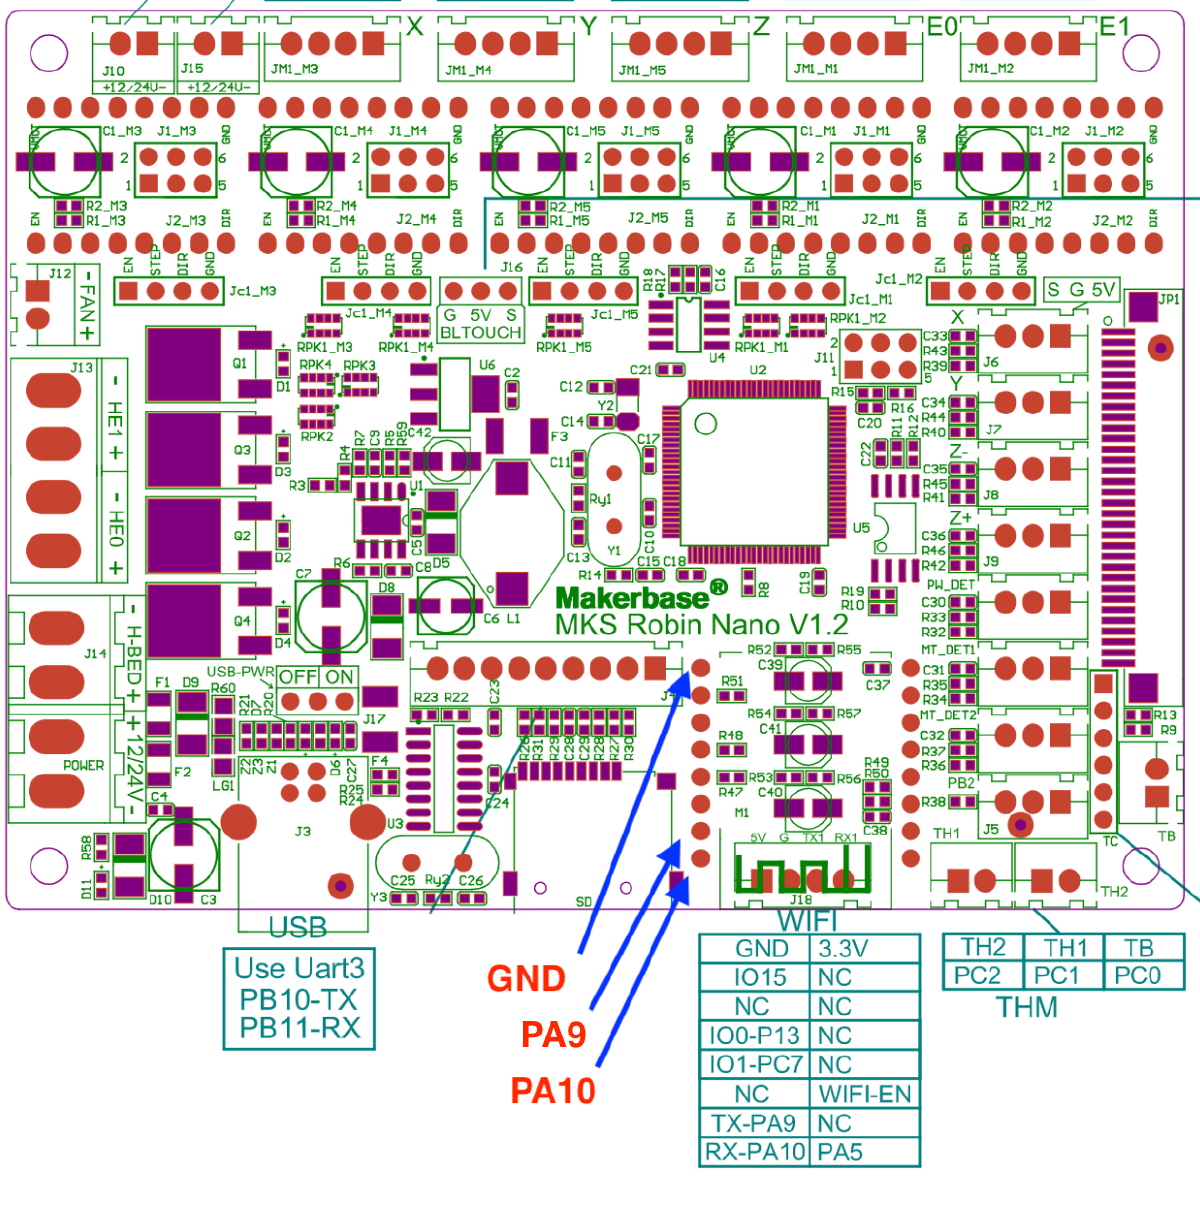
USART3 is the serial interface over a USB cable. If you are mounting Raspberry Pi inside the electronics enclosure then select USART1 and connect to GND, PA9, and PA10 pins. Don’t forget to disable Linux serial console and use a WiFi adapter with an external antenna.
-
Run “make” to compile the firmware.
-
Run “./scripts/update_mks_robin.py out/klipper.bin out/Robin_nano35.bin” to prepare firmware for flashing.
-
Copy the file “out/Robin_nano35.bin” to an SD card and then restart the printer with that SD card.
-
Download the Sapphire Plus config sample from here.
-
Open the Mainsail interface, go to “Settings” and upload your printer configuration as “printer.cfg” file.
-
Set correct serial interface. The default config comes with “/dev/ttyUSB0” but it might be different in your case or it can change after unplugging and plugging the cable back in. I suggest to list all serial devices by running “ls /dev/serial/by-id/” and then use serial device by its id like this: “/dev/serial/by-id/usb-1a86_USB_Serial-if00-port0”.
-
Go through configuration verification steps recommended by Klipper here.